Joomla 4 - Workflows Feature
It's exciting times to be involved with Joomla, with the launch of version 4 due to be released before the end of 2020.
One of the most anticipated functions of Joomla 4 has to be Workflows. Here at Storm, one of our clients is very excited about the prospect of allowing their users to create content, which is approved by admins before it is published.
To start off with, what exactly are content Workflows?
Content workflows help to remove the common pitfalls when it comes to producing site content.
No matter how big the task is; from planning and publishing a simple post to a multi-channel press releas, spread over a varied amount of online channels, a defined workflow will help all content editors and creators.
By using workflows this ensures:
- Content is accurate, consistent, and timely
- Content outcomes and deadlines are achievable
- Common content problems are addressed e.g. bottlenecks and inconsistencies/errors
Prerequisites
By all means, you don't need a version of Joomla 4 running, but it might help explain the following screenshots.
If you've got a version of Joomla 4 running on your local machine, then good work, continue reading.
If not, download a beta version of Joomla 4. You can also create a Joomla 4 beta site at https://launch.joomla.org.
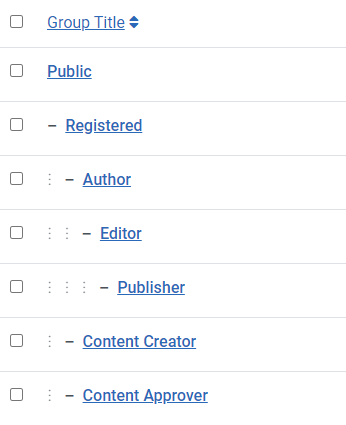
Create User Groups
In Joomla4, go to 'Users > Groups'. Create two user groups under the 'Registered' group. Use these names for the new groups:
- Content Creator
- Content Approver
It should look like this
Create User Accounts
Next, we'll create two user accounts:
- Go to "Users" then "Manage"
- Create one user in the "Content Creator" user group
- Create one user in the "Content Approver" user group
You should have something similar to the following:

Email Notifications
A great part of the workflow process is Joomla 4 can now send email notifications as part of the workflow, so we would highly recommend you enable that feature for both users:
- Make sure the "Receive System Emails" setting is on "Yes"
Allow user to submit articles
Now it's time to create a way for users to submit articles for the first step in the workflow:
- Go to "Content", then "Categories"
- Create an article category called "Blog"
- Create a menu link using the "Menu Item Type" called "Create Articles"
- Make sure your site has the Login module published on the front of your site, so the users can log in and submit articles
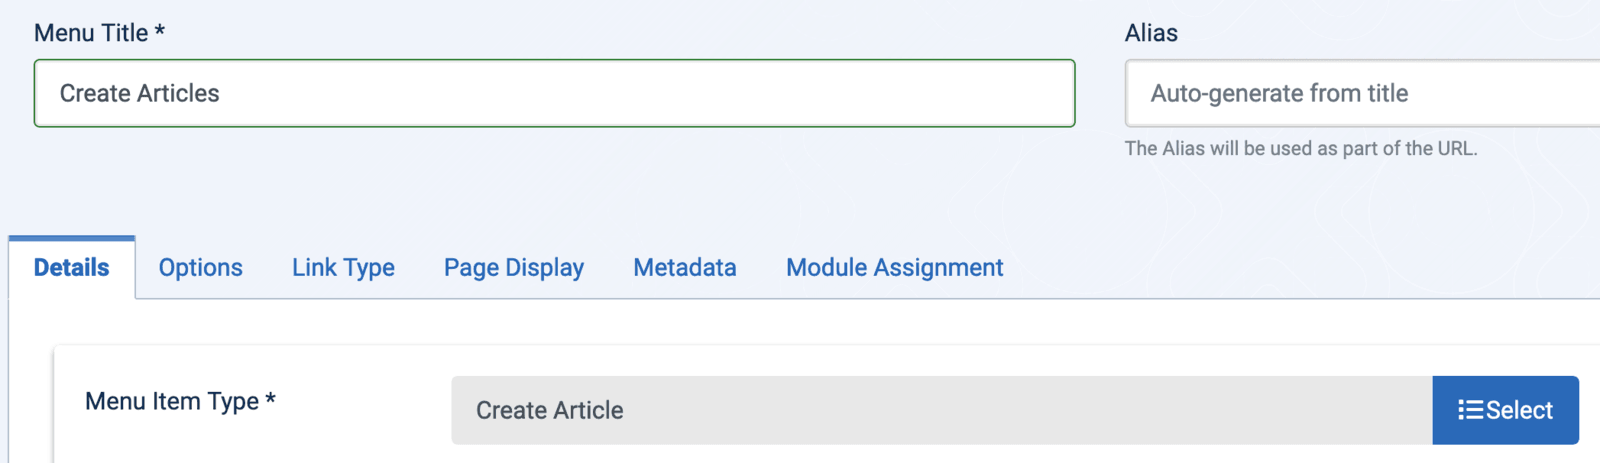
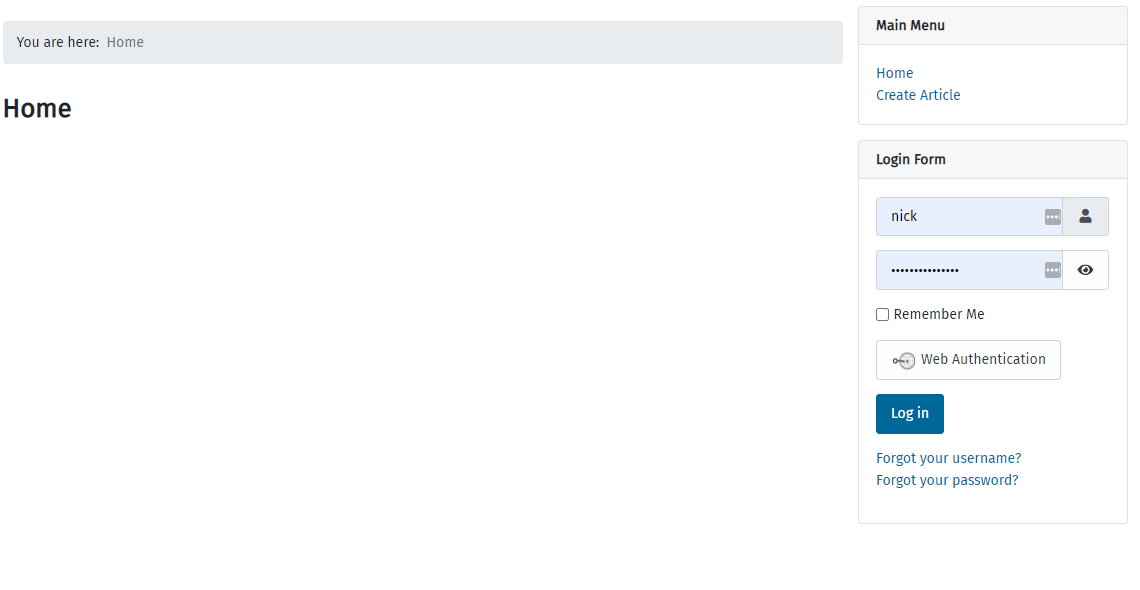
Now you've added the menu, the frontend should look something like this:
About Our Publishing Workflow
For this introductory tutorial, we'll create a very basic Joomla content publishing scenario. The workflow will consist of four steps:
- Content creation: the user in the "Content Creator" group will create blog posts
- The Workflows component will automatically assign a new post to a publishing workflow stage. We'll call this stage, "Waiting for Approval"
- The Workflows component will email the user in the "Content Approver" group about the newly created article
- The Content Approver will review the article and make a decision whether to publish the post (or not)
Step 1 - Create the Stages
These are the approval stages that your site content will pass through.
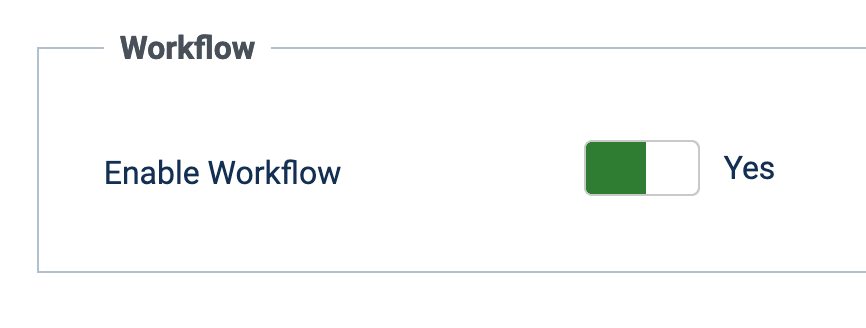
- In your Joomla 4 control panel, go to "Content" then "Articles"
- Click "Options" in the top-right corner
- Click "Integration"
- Enable the Workflow feature
- Click "Save"
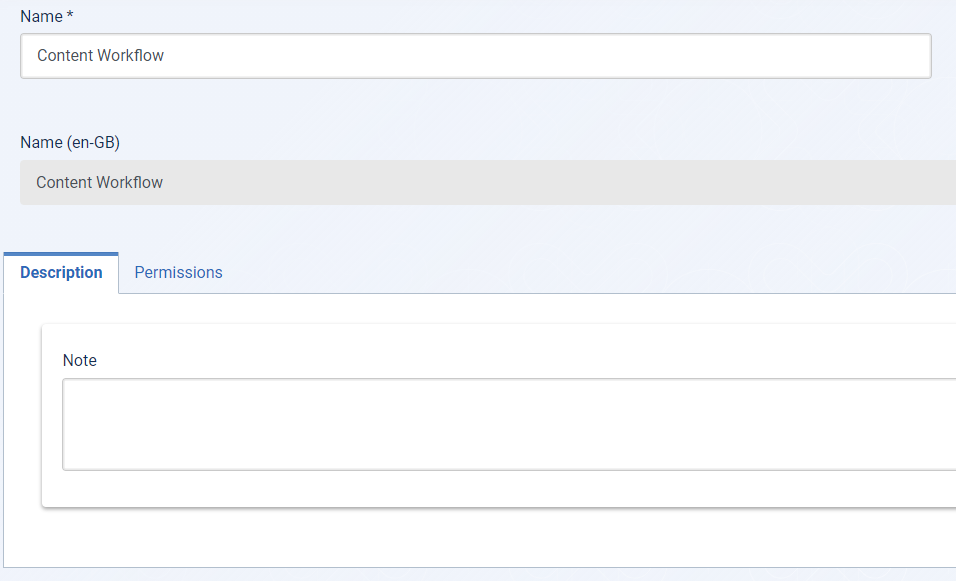
- Go to "Content", then "Workflows"
- Click the "New" button
- Enter "Content Workflow" into the "Name" field
- Click "Save & Close"
Now, create the two publishing workflow stages.
- While on the "Workflows List" screen, click on the circle with the number "1" under the "Stages" column, as shown below:
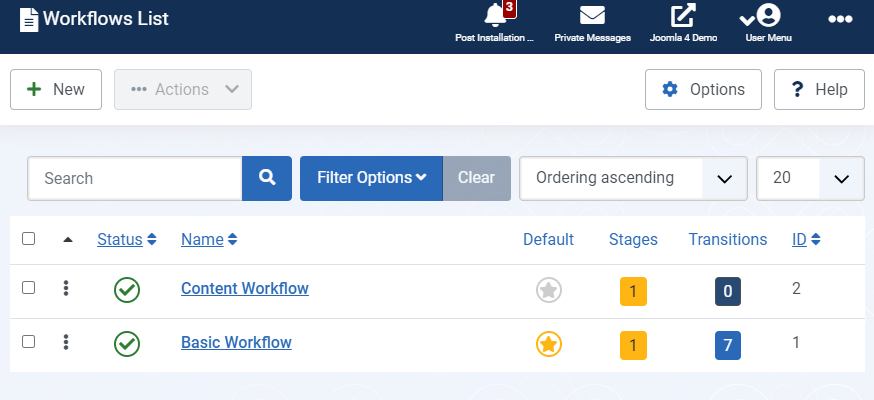
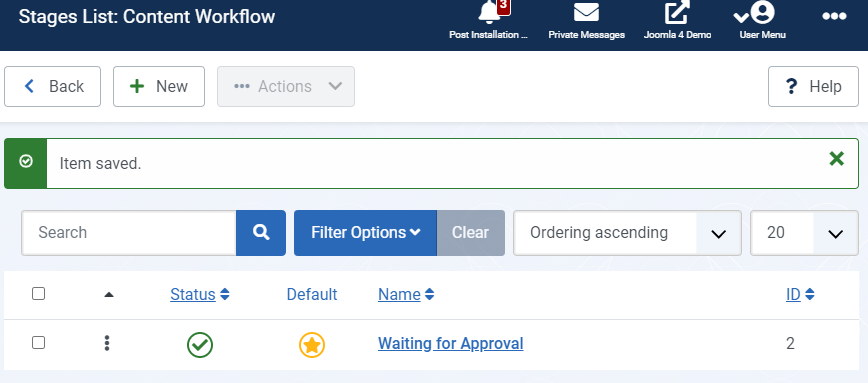
The "Stages List: Content Workflow" screen will then be loaded:

You will see one stage already created named "Basic Stage"
- Click on "Basic Stage" and change the name to "Waiting for Approval", then click Save & Close
You should now be back on the Stages List: Content Workflow screen:
- Click the "New" button.
- Enter the name, "Publish New Blog Post".
- Click "Save & Close".
Step 2 - Create the Transitions
Now we'll create what the Workflows component calls "Transitions". A transition is what moves an article (in this case a blog post) from one Stage of the workflow to the next.
- Go to "Content", then "Workflows"
- Click the "0" icon for "Transitions".
- Click the "New" button.
![]()
- Set the Publishing state to 'Published' option to Yes
![]()
- Next, change the permissions and allow the Content Approver group to 'Execute Transition'
![]()
- Click Save & Close
Step 3 - Access Control
At this point, we have the Content Workflow, two stages, and the transition done.
Now let's make sure that the content team members have the correct permissions they need.
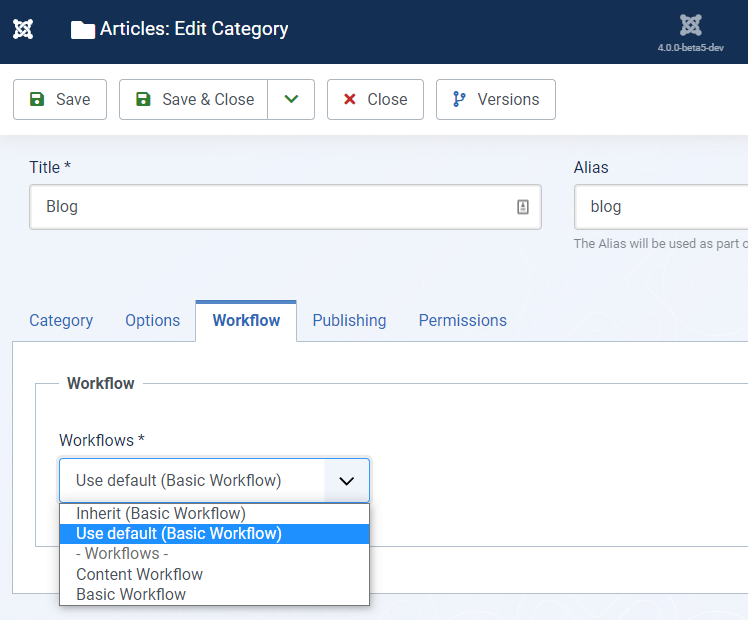
- Go to "Content", then "Categories", then "Blog"
- Under the "Workflow tab, select "Workflow":
- Go to the "Permissions" tab
- Select "Allowed" for the "Create" and "Edit Own" user actions for the "Content Creator" user group
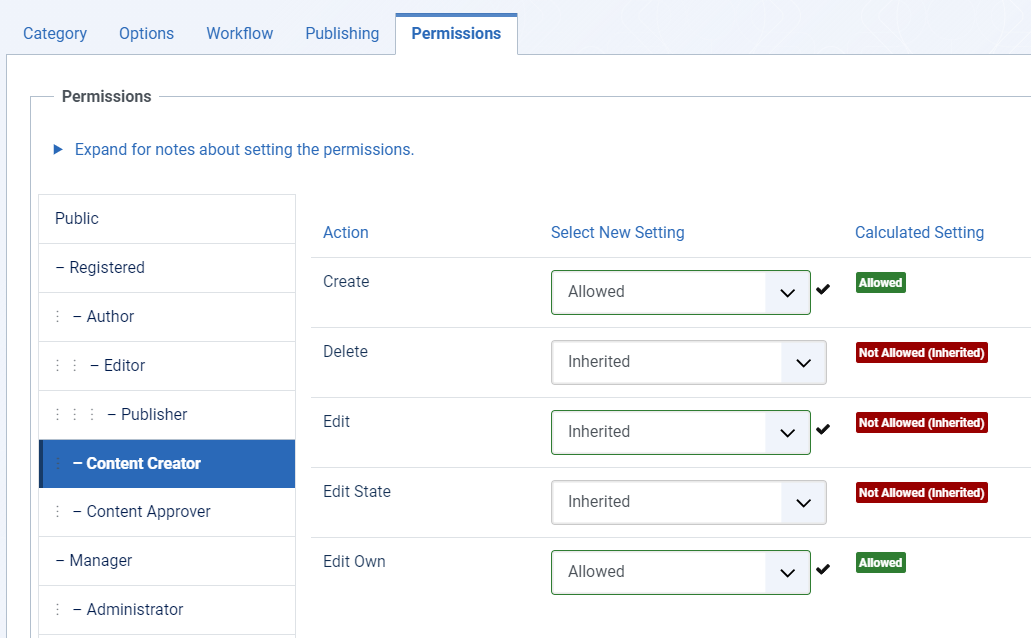
- Next, select "Allowed" for the "Delete", "Edit", "Edit State" and "Edit Own" user actions for the "Content Approver" user group.
- Click "Save & Close".
Step 4 - Test the Workflow
That's it! You just completed your first publishing workflow. Congratulations!
Now it's time to test the workflow:
- Login the front of your site as the user in the Content Creator group
- Click "Create Article" and submit an article
- The article will get the "Waiting for Approval" status in the admin area
- The article will also get the "Unpublished" status on the site's frontend
- The user from the "Content Approver" group will get an email notification. They can now log in and publish the post.
See how simple it is? There's so many situations where workflow can be used. Give access to different departments maybe? Give access to only certain categories. The possibilities are endless!


